
An active nbn® service
An nbn® connection box or wall socket
Your modem or router
A power adapter
An Ethernet cable
Your Wi-Fi login details
By: Yomojo Editorial Team
Last Updated: 06 Aug 2026
Getting your nbn® modem set up properly is the first step to enjoying fast and reliable internet at home. Whether you’re streaming movies, working remotely, gaming online, or simply browsing, a good setup can make a big difference to your everyday experience.
The good news? Most nbn® modem setups are much easier than people expect.
In this guide, we’ll walk you through how to connect to your modem, set up your Wi-Fi, and troubleshoot common problems without getting too technical. Setup can vary slightly depending on your nbn® connection type, but the overall process is usually straightforward.
Before diving into the setup, it helps to have everything ready.

An active nbn® service
An nbn® connection box or wall socket
Your modem or router
A power adapter
An Ethernet cable
Your Wi-Fi login details

NTD (Network Termination Device)
NCD (Network Connection Device)
If your service hasn’t been activated yet, you can compare available home nbn® plans first.
A quick tip before starting: Place your modem somewhere open and central in the home if possible. This can help improve Wi-Fi coverage later on.
The equipment required to connect your home depends on the nbn® technology available at your address. Some connection types use an nbn connection box together with a Wi-Fi router, while others connect through a compatible modem-router plugged directly into a telephone wall socket.
Technology | Device Used |
|---|---|
FTTP | Network Termination Device |
FTTC | NBN Connection Box |
HFC | HFC Connection Box |
FTTN | Telephone wall socket |
Fixed Wireless | NBN Connection Box |
The exact connection process can vary by technology and provider, so check the official nbn® connection guidance and the setup instructions supplied with your service before connecting your equipment.
For FTTP, FTTC, HFC and Fixed Wireless services, a Wi-Fi router will generally connect to the nbn connection box using an Ethernet cable. FTTN services normally use a compatible modem-router connected directly to a telephone wall socket. For further details you may visit guide The Complete Guide to nbn® Technology Types (FTTP, FTTN, HFC, FTTC, Fixed Wireless)
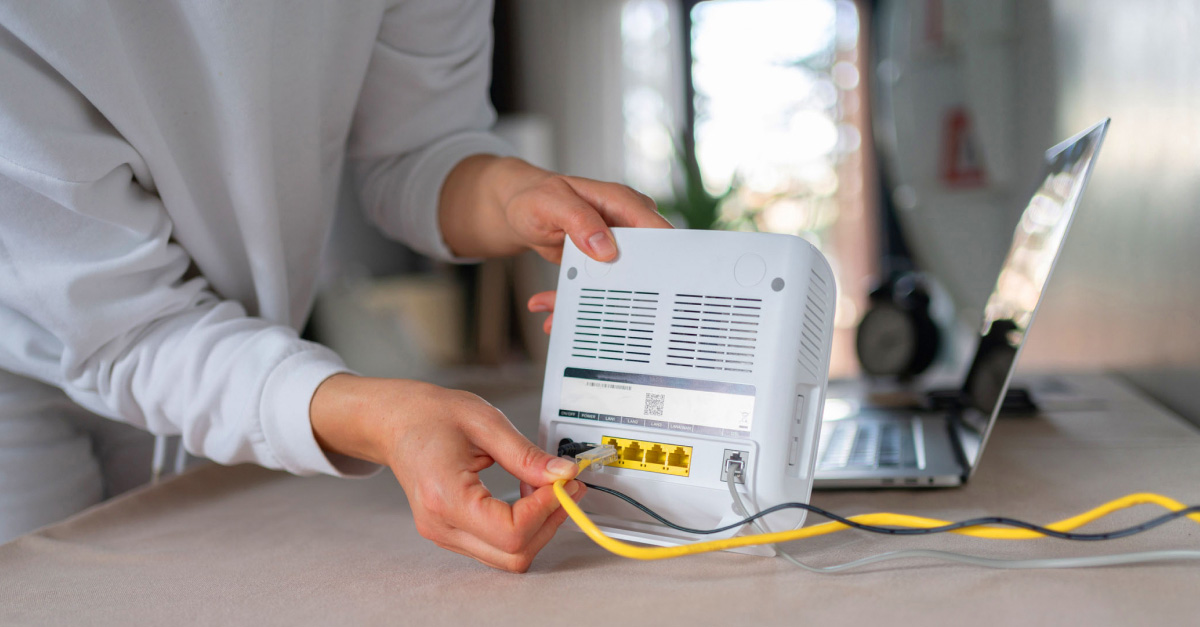
Start by finding the WAN or Internet port on your modem.

Plug one end into the nbn® connection box
Plug the other end into the modem’s WAN/Internet port

WAN
Internet
Broadband
Make sure the cable is connected firmly on both ends. This is one of the most important parts of the setup, so it’s worth double-checking before moving on.
Next, connect the modem to power and switch it on.
You’ll usually see several lights flashing while the modem starts up. This is completely normal. After a few minutes, the lights should be set. Common modem lights include:

Power
Internet/WAN
Wi-Fi
LAN

Modem is switched on
Connected to nbn®
Wireless network active
Wired device connected
If the internet light stays off for a while, don’t panic. Some services take a little longer to activate.
Most modern modems come with a default Wi-Fi name and password printed on a sticker underneath or on the back.
You can use these details straight away, but many people prefer to customise them.
To change your Wi-Fi settings:
Connect your phone or computer to the modem
Open a web browser
Enter the modem login address
Common addresses include:
192.168.0.1
192.168.1.1
Once logged in, you can:
Change your Wi-Fi name (SSID)
Create a stronger password
Separate your 2.4GHz and 5GHz networks if supported
Secure Your Router and Wi-Fi
After accessing your router settings, review both the administrator login and the Wi-Fi network credentials. These are normally separate: the administrator password controls access to the router’s settings, while the Wi-Fi password allows devices to join your network.
Change any default administrator credentials, create a strong and unique Wi-Fi passphrase, and check whether automatic firmware updates are available. The Australian Cyber Security Centre provides additional guidance on how to secure your Wi-Fi and router.
Depending on your provider, your service may activate automatically.
Some providers may require:
ISP login details
Automatic modem configuration
Remote activation
In many cases, activation only takes a few minutes.
Once the internet light becomes stable, try opening a website or streaming a video to confirm everything is working properly.
Not all nbn® connections work exactly the same way.
Here’s a simple breakdown of the most common technologies.
FTTP is one of the easiest setups.
Your modem connects directly to the NTD using Ethernet. FTTP is generally very stable and supports high-speed plans.
FTTN uses existing copper phone lines.
Your modem plugs into the telephone wall socket, so you’ll need a VDSL2-compatible modem.
Older ADSL modems may not work correctly.
FTTC setups include an NCB device that connects to your wall socket.
Your modem then connects to the NCB using Ethernet.
HFC uses a coaxial cable connection.
You’ll usually have an nbn® connection box connected to the wall outlet, with your modem linked via Ethernet.
Fixed Wireless uses an outdoor antenna connected to an indoor unit.
Your modem connects to the indoor box using Ethernet.
Weather conditions can sometimes affect signal quality with wireless services.
Even straightforward setups can occasionally hit a few bumps.
The good news is that most issues are easy to fix.

This could happen because of:
Loose cables
Activation delays
Incorrect modem settings
Temporary outages
Restarting both the modem and the nbn® connection box often solves the issue.

This is surprisingly common.
The Ethernet cable from the nbn® box should always connect to the modem’s WAN or Internet port, not a LAN port.

If your Wi-Fi network doesn’t appear:
Wait a few more minutes
Restart the modem
Check that the Wi-Fi light is on
Some modems also have a physical Wi-Fi button that may need to be enabled.

Slow speeds are not always caused by the nbn® network itself.
Other common causes include:
Poor modem placement
Too many connected devices
Older hardware
Wi-Fi interference
Once your modem is connected, a few simple changes can improve your internet experience even more.
Avoid hiding the modem:
Inside cupboards
Behind TVs
Under desks
Tip: Open spaces usually provide better signal coverage.
Devices like microwaves, cordless phones, and Bluetooth gadgets can interfere with Wi-Fi signals.
Keeping some distance can help improve stability.
Many newer modems support both 2.4GHz and 5GHz networks.
2.4GHz offers better range
5GHz usually delivers faster speeds
Note: Using the right band for your devices can improve performance around the home.
If you have dead zones or weak coverage in certain rooms, a mesh Wi-Fi system can help spread the signal more evenly across the house.
Setting up your nbn® modem doesn’t have to feel overwhelming.
Once you understand the basics, the process is usually quick and straightforward:
Connect the modem correctly
Power everything on
Configure your Wi-Fi
Activate your internet service
Troubleshoot if needed
Using compatible hardware and choosing the right plan can also make a noticeable difference to your overall internet experience.
If you’re ready to get connected, explore Yomojo's range of compatible nbn® modems or compare flexible home nbn® plans for Australian households.
About this article
Written by
Yomojo Editorial Team
Reviewed by
James Linton, CEO, Yomojo
Published by
Yomojo
Editorial Standards
This article was created by the Yomojo Editorial Team and reviewed by subject matter experts to help ensure it is accurate, up to date and aligned with current Yomojo products and Australian telecommunications information.
Getting your nbn® modem set up properly is the first step to enjoying fast and reliable internet at home. Whether you’re streaming movies, working remotely, gaming online, or simply browsing, a good setup can make a big difference to your everyday experience.
The good news? Most nbn® modem setups are much easier than people expect.
In this guide, we’ll walk you through how to connect to your modem, set up your Wi-Fi, and troubleshoot common problems without getting too technical. Setup can vary slightly depending on your nbn® connection type, but the overall process is usually straightforward.
If your service hasn’t been activated yet, you can compare available home nbn® plans first.
A quick tip before starting: Place your modem somewhere open and central in the home if possible. This can help improve Wi-Fi coverage later on.
The exact connection process can vary by technology and provider, so check the official nbn® connection guidance and the setup instructions supplied with your service before connecting your equipment.
For FTTP, FTTC, HFC and Fixed Wireless services, a Wi-Fi router will generally connect to the nbn connection box using an Ethernet cable. FTTN services normally use a compatible modem-router connected directly to a telephone wall socket. For further details you may visit guide The Complete Guide to nbn® Technology Types (FTTP, FTTN, HFC, FTTC, Fixed Wireless)
Next, connect the modem to power and switch it on.
You’ll usually see several lights flashing while the modem starts up. This is completely normal. After a few minutes, the lights should be set. Common modem lights include:
Most modern modems come with a default Wi-Fi name and password printed on a sticker underneath or on the back.
You can use these details straight away, but many people prefer to customise them.
To change your Wi-Fi settings:
Connect your phone or computer to the modem
Open a web browser
Enter the modem login address
Common addresses include:
192.168.0.1
192.168.1.1
Once logged in, you can:
Change your Wi-Fi name (SSID)
Create a stronger password
Separate your 2.4GHz and 5GHz networks if supported
Secure Your Router and Wi-Fi
After accessing your router settings, review both the administrator login and the Wi-Fi network credentials. These are normally separate: the administrator password controls access to the router’s settings, while the Wi-Fi password allows devices to join your network.
Change any default administrator credentials, create a strong and unique Wi-Fi passphrase, and check whether automatic firmware updates are available. The Australian Cyber Security Centre provides additional guidance on how to secure your Wi-Fi and router.
Depending on your provider, your service may activate automatically.
Some providers may require:
ISP login details
Automatic modem configuration
Remote activation
In many cases, activation only takes a few minutes.
Not all nbn® connections work exactly the same way.
Here’s a simple breakdown of the most common technologies.
Once your modem is connected, a few simple changes can improve your internet experience even more.
Avoid hiding the modem:
Inside cupboards
Behind TVs
Under desks
Tip: Open spaces usually provide better signal coverage.
Devices like microwaves, cordless phones, and Bluetooth gadgets can interfere with Wi-Fi signals.
Keeping some distance can help improve stability.
Many newer modems support both 2.4GHz and 5GHz networks.
2.4GHz offers better range
5GHz usually delivers faster speeds
Note: Using the right band for your devices can improve performance around the home.
If you have dead zones or weak coverage in certain rooms, a mesh Wi-Fi system can help spread the signal more evenly across the house.
Setting up your nbn® modem doesn’t have to feel overwhelming.
Once you understand the basics, the process is usually quick and straightforward:
Connect the modem correctly
Power everything on
Configure your Wi-Fi
Activate your internet service
Troubleshoot if needed
Using compatible hardware and choosing the right plan can also make a noticeable difference to your overall internet experience.
If you’re ready to get connected, explore Yomojo's range of compatible nbn® modems or compare flexible home nbn® plans for Australian households.
About this article
Written by
Yomojo Editorial Team
Reviewed by
James Linton, CEO, Yomojo
Published by
Yomojo
Editorial Standards
This article was created by the Yomojo Editorial Team and reviewed by subject matter experts to help ensure it is accurate, up to date and aligned with current Yomojo products and Australian telecommunications information.